Icebox Cake

Icebox cake is the kind of dessert that somehow manages to feel both nostalgic and timeless. With its layers of soft, creamy Cool Whip and the satisfying crunch of Oreo cookies, this no-bake dessert offers the perfect balance of textures and flavors. It’s not just a cake—it’s a gathering of memories, holidays, and summer afternoons spent with family and friends. As it chills in the refrigerator, the Oreos soften, melding into creamy goodness, creating an irresistible treat that feels like a special occasion, no matter when you choose to make it.
Table of Contents
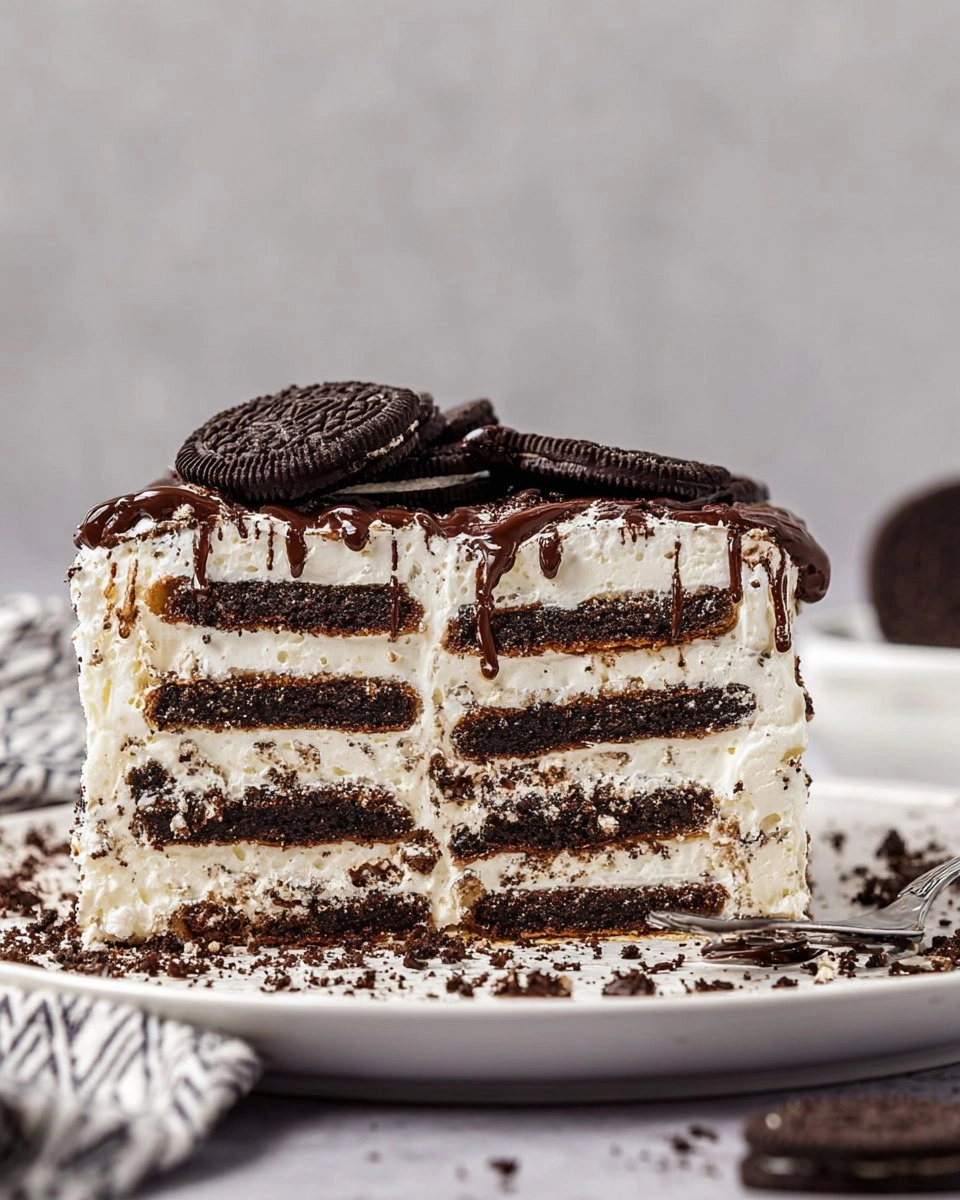
I fondly remember the first time I discovered icebox cake. It was during a summer barbecue when a friend brought this delightful dish, its layers peeking out playfully like a chilled canvas of sweetness. I was captivated by how simple yet indulgent it was. You don’t need to bake anything—a huge plus when the heat’s turned up! Plus, it’s incredibly budget-friendly, making it easy to whip up for gatherings or quiet evenings at home. If you haven’t tried making an icebox cake yet, now is the perfect time to dive in!
Why You’ll Love This Recipe
- Simple & Quick: This icebox cake comes together with minimal effort, with a prep time that’s practically a breeze.
- Irresistible Flavor: The combination of creamy Cool Whip and crunchy Oreos creates a dreamy texture and sweet satisfaction.
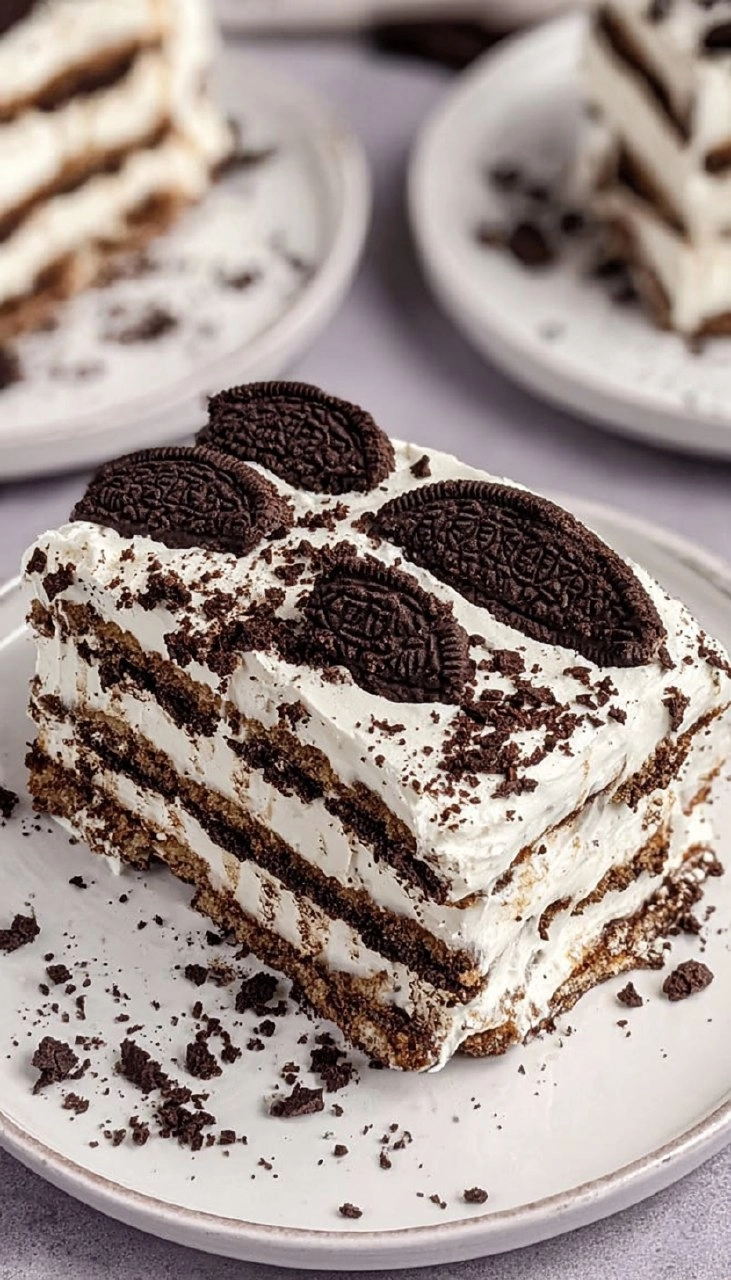
- Eye-Catching Appeal: You can layer it high, and it looks so inviting with those layers on display—perfect for impressing guests!
- Flexible Serving: Enjoy it as a light dessert, a party treat, or even a unique breakfast option on special mornings.
- Diet-Friendly Options: Easily made gluten-free by opting for gluten-free Oreos, making it accessible for everyone.
Ingredients You’ll Need
- 2 cups (473ml) milk: Used to soften the Oreos for an easy bite. Whole milk adds richness, but you can also use almond or dairy-free milk.
- 3 (8oz) containers Cool Whip: This is the secret to the creamy texture. If you prefer a homemade touch, whipped heavy cream is a fantastic alternative.
- 2 (18.12oz) packages Oreos, family size: These famed cookies provide the satisfying crunch and sweet flavor. Consider using other cookie types for a fun twist!
- Additional Oreos, chocolate sauce, or chocolate shavings for decoration: These are optional but add a beautiful finishing touch and extra texture to the presentation.
How to Make Icebox Cake
- Prepare the Base: On a serving platter, spread a small amount of Cool Whip in a rectangular shape. This base layer helps hold the first Oreo layer in place.
- Dip the Oreos: In a container, pour in the milk. You’ll need to dip each Oreo quickly to soften them. This is crucial to ensure they’re not crunchy after chilling.
- Layer the First Oreo Sheet: Arrange 18 Oreos on top of the Cool Whip in a 3×6 rectangle formation.
- Cover with Cool Whip: Spread a layer of Cool Whip generously over the Oreos, making sure to cover them completely.
- Repeat the Process: Continue dipping Oreos in milk and layering them with Cool Whip. You can make about five layers of Oreos, alternating until all ingredients are used.
- Finish with Cool Whip: Once all layers are assembled, top the entire cake with a final layer of Cool Whip, smoothing it out nicely.
- Chill: Cover the cake with plastic wrap and refrigerate for at least 9 hours. This waiting period allows the Oreos to absorb moisture and soften beautifully.
- Decorate and Serve: Before serving, feel free to sprinkle crushed Oreos, drizzle chocolate sauce, or add chocolate shavings on top for that extra indulgence.
Storing & Reheating
Store any leftover icebox cake in the refrigerator for up to a week. It’s best kept in an airtight container, ensuring it retains its creamy texture. If you’re looking to save it for longer, this dessert freezes well for up to three months. Just wrap it tightly in plastic wrap and then in aluminum foil. When you’re ready to enjoy it again, thaw it in the refrigerator overnight. Keep in mind that the texture may change slightly upon freezing, but it can still be delicious—add fresh whipped cream on top right before serving to freshen it up!
Chef’s Helpful Tips
- Don’t Skip the Soaking: Dipping Oreos in milk is crucial; it transforms this dessert from a cookie layer cake into something lusciously creamy!
- Room Temperature Ingredients: Cool Whip works best when it’s been chilled slightly before spreading, ensuring an easy layering process.
- Be Creative with Layers: Try different cookies like chocolate or vanilla wafers if you’re feeling adventurous. Each choice gives a unique flavor!
- Make Ahead: Preparing this cake a day in advance not only makes it more convenient but also lets the flavors mingle beautifully.
- Check for Freshness: If you’re making this cake for a gathering, double-check the expiration date on your Oreos and Cool Whip.
Icebox cake is one of those desserts that melds nostalgia with ease, a true crowd-pleaser that sparks joy at any gathering. As you gather the layers, you’ll experience the excitement of constructing something beautiful and delicious all at once. Don’t hesitate to add your twist—maybe try an assortment of cookies or a drizzle of caramel instead of chocolate! These variations allow you to make this cake your own.
No matter how you choose to make it, I invite you to enjoy every creamy, crunchy bite.
Recipe FAQs
Can I use homemade whipped cream instead of Cool Whip?
Absolutely! Homemade whipped cream is a fantastic substitute that adds a fresh, rich flavor. Just make sure that you whip it until stiff peaks form for the best texture.
How long will it last in the fridge?
Icebox cake can be stored in the refrigerator for about a week. The flavors continue to meld over time, making it even tastier!
Can I freeze icebox cake?
Yes! You can freeze it for up to three months. Ensure it’s tightly wrapped in plastic wrap and then foil to keep it fresh. Thaw in the refrigerator before serving.
What other cookies can I use?
Feel free to experiment with different cookies! Vanilla wafers, fudge stripe cookies, or even graham crackers can add unique flavors and textures to your icebox cake.
PrintMore CAKES Recipes
Did You Enjoy Making This Recipe? Please rate this recipe with ⭐⭐⭐⭐⭐ or leave a comment.
📖 Recipe Card
Icebox Cake
- Prep Time: 10 minutes
- Cook Time: No data
- Total Time: 0 hours
- Yield: 12 servings 1x
- Category: Cakes
- Method: No-bake
- Cuisine: American
Description
This icebox cake features luscious layers of chocolatey oreos and fluffy cool whip, creating a delightful dessert that’s easy to prepare and perfect for gatherings or a sweet treat at home.
Ingredients
- 2 cups milk
- 3 (8oz) containers cool whip
- 2 (18.12oz) packages oreos, family size
- Additional oreos, chocolate sauce or chocolate shavings for decoration
Instructions
- Spread a small amount of cool whip on a serving platter in a rectangular shape to hold the first layer in place.
- Dip each oreo in milk to soften it before assembling.
- Arrange 18 dippped oreos on top of the cool whip in a 3×6 rectangle, then spread a layer of cool whip over the oreos.
- Repeat the process by dipping more oreos in milk and alternating layers of oreos and cool whip until all layers are assembled.
- Cover the top with a final layer of cool whip and refrigerate for at least 9 hours to soften the cookies before serving.
Notes
Letting the cake sit overnight in the refrigerator results in the best flavor and texture.
For extra chocolate flavor, top with crushed oreos, chocolate sauce or shavings before serving.
Nutrition
- Serving Size: 1 slice
- Calories: 240
- Sugar: 20g
- Sodium: 240mg
- Fat: 10g
- Saturated Fat: 5g
- Unsaturated Fat: 3g
- Trans Fat: 0g
- Carbohydrates: 34g
- Fiber: 1g
- Protein: 2g
- Cholesterol: 10mg