Authentic Black and White Cookies

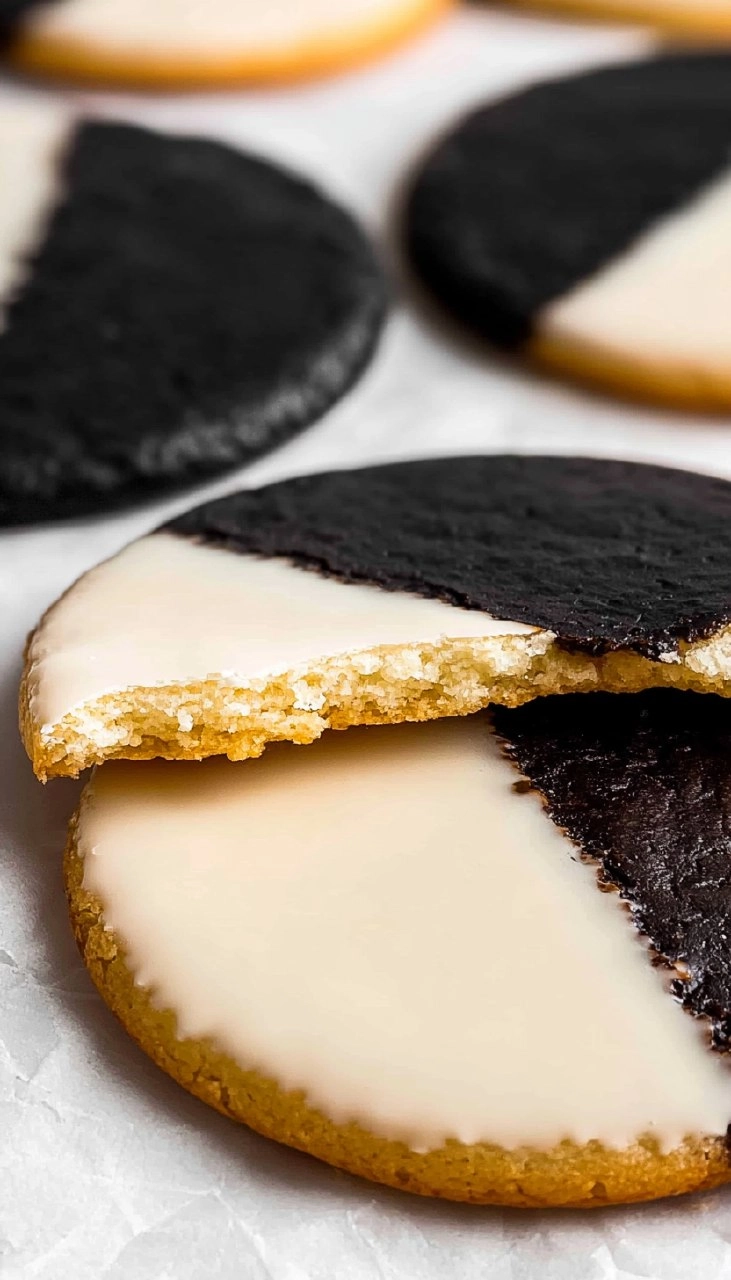
Black and white cookies are a delightful treat that many of us have enjoyed since childhood. With their fluffy, cake-like texture and a charming half-and-half frosting, they exude a nostalgic quality that’s hard to resist. The subtle taste of vanilla and chocolate intertwine perfectly, making every bite a little celebration of flavor. These cookies are not just a beautiful addition to any dessert spread; they also boast a rich history that traces back to New York City delis, which is just part of what makes them so special.
Table of Contents
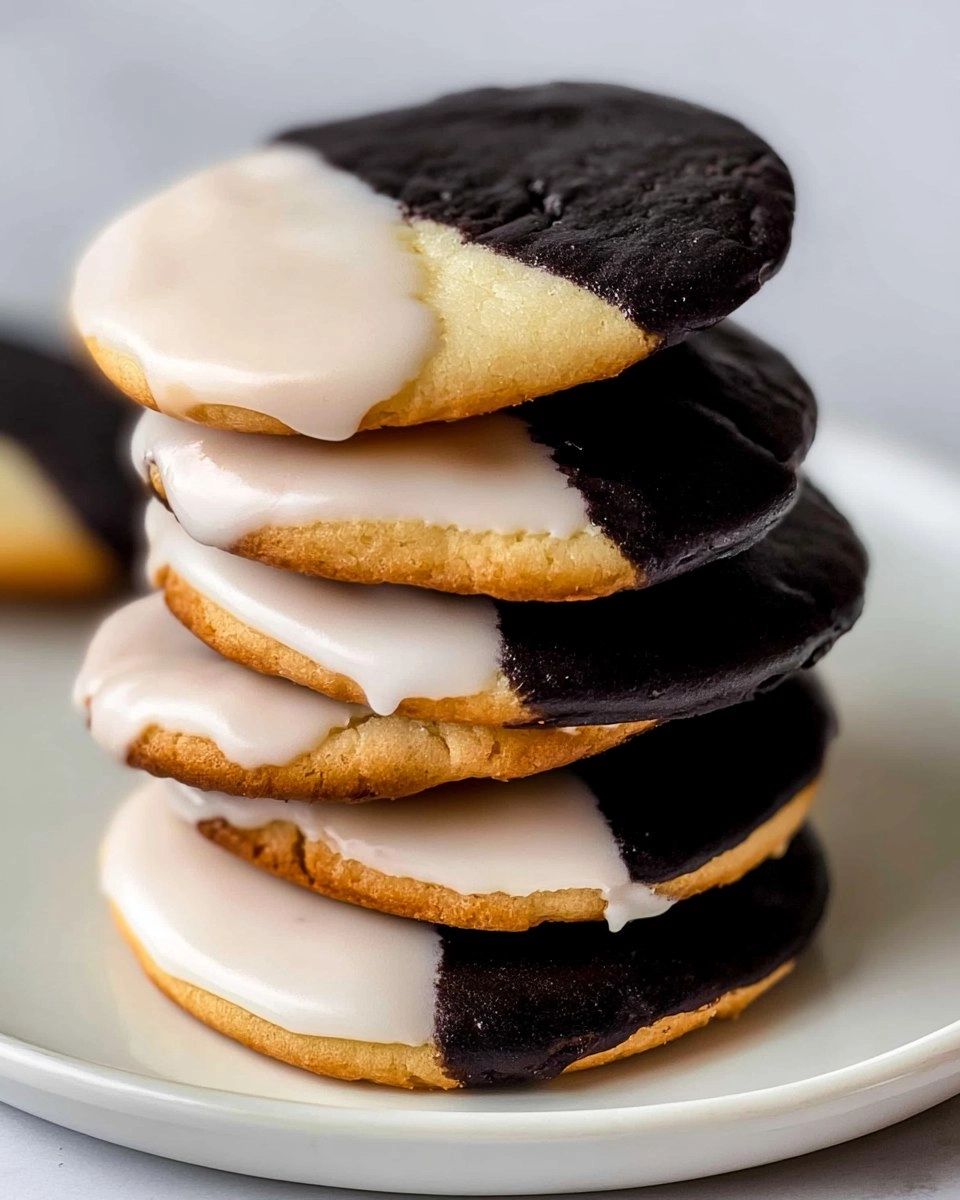
When I first discovered black and white cookies, I was immediately enamored. They seemed to hold a certain magic, combining two classic flavors into one gorgeous package. The beauty of black and white cookies goes beyond their flavor; they are incredibly easy to make at home! With just a handful of simple ingredients and an approachable method, you can whip up a batch that’s just as good, if not better, than those from the corner bakery. So grab your apron and get ready to indulge in the magic of authentic black and white cookies!
Why You’ll Love This Recipe
- Simple & Quick: These cookies come together in about an hour, making them an easy option for a sweet craving or last-minute gatherings.
- Irresistible Flavor: With a light, cakey texture balanced by sweet vanilla and rich chocolate frostings, each bite is pure bliss.
- Eye-Catching Appeal: The striking black and white contrast of the frosting makes them a show-stopping dessert for any occasion.
- Flexible Serving: Perfect for after-school snacks, birthday parties, or even a cozy evening at home—they’re versatile enough to fit any moment.
- Diet-Friendly Options: Easily adapt this recipe to be gluten-free or dairy-free with a few simple substitutions!
Ingredients You’ll Need
- 2 cups (248g) all-purpose flour: This is the foundation of the cookie, giving it structure. For a gluten-free alternative, you can use a 1-to-1 gluten-free flour blend.
- ½ teaspoon baking soda: This helps the cookies rise and achieve a soft texture, so make sure it’s fresh.
- ½ teaspoon salt: A pinch of salt amplifies the flavor of the cookies. Don’t skip it!
- 10 tablespoons (140g) unsalted butter, softened: Using unsalted butter allows you to control the salt level. Make sure it’s at room temperature for easy creaming.
- 1 cup (200g) granulated sugar: This sweetens your cookies and helps achieve a tender crumb.
- 2 large eggs, room temperature: Eggs add moisture and richness to the dough, so bring them to room temperature for better incorporation.
- 2 teaspoons vanilla extract: Pure vanilla extract enhances the flavor of the cookies; it’s worth the splurge!
- ⅓ cup (82g) sour cream, room temperature: Sour cream adds moisture and tanginess, keeping the cookies soft and flavorful.
- 2 ¾ cups (301g) powdered sugar, divided: This is for both the white and chocolate frostings, giving them their sweet and smooth texture.
- 2 tablespoons light corn syrup, divided: Corn syrup adds shine and helps the frostings set without becoming hard.
- 1 teaspoon vanilla extract, divided: This is used in the white frosting for vanilla flavor.
- 2-5 tablespoons warm water, divided: Water ensures your frosting reaches the perfect spreading consistency; adjust as needed.
- ¼ cup (20g) unsweetened cocoa powder: This gives the chocolate frosting its rich flavor and color.
How to Make Authentic Black and White Cookies
- Preheat the Oven: Set your oven to 350°F (175°C) and prepare two cookie sheets by lining them with parchment paper or silicone mats for easy removal.
- Mix Dry Ingredients: In a small bowl, whisk together 2 cups of all-purpose flour, ½ teaspoon baking soda, and ½ teaspoon salt. This mixture helps distribute the leavening agent evenly throughout the dough.
- Cream Butter and Sugar: In a stand mixer fitted with the paddle attachment or using an electric hand mixer, beat 10 tablespoons of softened unsalted butter and 1 cup of granulated sugar on medium-high speed until the mixture is light and fluffy, usually about 3 minutes. Scrape down the sides and bottom of the bowl to ensure all ingredients are combined.
- Add Eggs and Vanilla: Mix in 2 large eggs and 2 teaspoons of vanilla extract until smooth. This step incorporates air, giving the cookies a lovely texture.
- Incorporate Dry Ingredients: With the mixer on low speed, add half of the flour mixture until just combined. Then add ⅓ cup of sour cream and mix until combined. Finally, add the remaining dry ingredients and mix until just incorporated; the dough will be soft and slightly sticky.
- Scoop the Dough: Using a large cookie scoop (about 3 tablespoons), drop the dough onto the prepared cookie sheets, spacing them about 3 inches apart. This will allow for expansion during baking.
- Bake the Cookies: Place the cookie sheets in the preheated oven and bake for 15 to 18 minutes, or until the edges are a light golden brown, and the centers are just set. Remove them from the oven and let the cookies cool completely on a wire rack.
- Prepare the White Frosting: Once the cookies have cooled, turn them over to their flat side. In a medium bowl, whisk together 1 ¼ cups of powdered sugar with 1 tablespoon of corn syrup, ½ teaspoon of vanilla extract, and 1 to 2 tablespoons of warm water until it reaches a smooth, spreadable consistency.
- Frost with White Icing: Frost half of each cookie with the white frosting, using a spatula or knife to help spread it evenly.
- Prepare the Chocolate Frosting: In another bowl, mix together 1 ½ cups of powdered sugar, ¼ cup of unsweetened cocoa powder, 1 tablespoon of corn syrup, ½ teaspoon of vanilla extract, and 1 to 3 tablespoons of warm water until smooth. This will give you a luscious chocolate frosting.
- Frost with Chocolate Icing: Use the chocolate frosting to cover the other half of each cookie, ensuring a beautiful half-and-half appearance.
- Set and Serve: Allow the frosted cookies to sit for about 20 minutes to let the frosting set before serving.
Storing & Reheating
To store your authentic black and white cookies, place them in an airtight container with sheets of wax paper between the layers to prevent sticking. They’ll stay fresh at room temperature for about 3 days. If you want to keep them longer, freeze them in a single layer on a baking sheet, then transfer them to a freezer-safe bag or container where they can last up to 3 months. The texture may slightly change after thawing, but you can refresh them in the microwave for 10-15 seconds to enjoy that soft, fresh-baked goodness again.
Chef’s Helpful Tips
- Be sure your butter is at room temperature for easier creaming; cold butter will not incorporate well, leading to denser cookies.
- If your dough seems too sticky, you can chill it for 15-20 minutes before scooping.
- For beautifully smooth frosting, mix until no lumps remain; this will give your cookies that professional look.
- If you find yourself short on time, you can skip the frosting and enjoy the cookies plain—they’re delicious on their own!
- Experiment with flavor variations by adding citrus zest or almond extract for a twist.
The beauty of authentic black and white cookies lies in their simplicity and versatility. They bring joy not just in their taste, but also in the memories they create as friends and family gather to enjoy them. There’s something special about sharing a sweet treat that beautifully bridges different flavor traditions. So, whether it’s for a birthday party, a rainy day snack, or just a delightful moment for yourself, these cookies are sure to impress and satisfy.
Recipe FAQs
How do I know when my cookies are done baking?
Your cookies are done when their edges are light golden brown and the centers look set but might still appear slightly soft. They will firm up as they cool, so avoid overbaking to keep that delightful texture.
Can I freeze the frosting?
While it’s best to frost the cookies fresh for optimal taste and texture, you can freeze the leftover frosting in an airtight container. Just be sure to re-mix it thoroughly once thawed, as it may separate.
What can I use instead of sour cream?
Greek yogurt or buttermilk can be great substitutes for sour cream in this recipe. Both will maintain the moisture and tanginess that sour cream provides.
Can I make these cookies in advance?
Absolutely! You can make the cookie dough ahead of time and refrigerate it for up to 2 days before baking. Just be sure to let it sit at room temperature for a bit before scooping, as cold dough can be difficult to work with.
PrintMore COOKIES Recipes
- Gingerbread Kiss Cookies
- Nutter Butter Hatching Chick Cookies
- Scoopable Cookies
- Rainbow Sprinkle Butter Cookies
- Blueberry Muffin Cookies
Did You Enjoy Making This Recipe? Please rate this recipe with ⭐⭐⭐⭐⭐ or leave a comment.
📖 Recipe Card
Authentic Black and White Cookies
- Prep Time: 45 minutes
- Cook Time: 18 minutes
- Total Time: 1 hour 3 minutes
- Yield: 24 cookies 1x
- Category: Cookies
- Method: Baking
- Cuisine: American
Description
These Authentic Black and White Cookies boast an irresistible flavor and simple preparation. Made with butter, eggs, and a touch of cocoa, they are ideal for dessert lovers seeking a tasty homemade treat.
Ingredients
- 2 cups (248g) all-purpose flour
- ½ teaspoon baking soda
- ½ teaspoon salt
- 10 tablespoons (140g) unsalted butter, softened
- 1 cup (200g) granulated sugar
- 2 large eggs, room temperature
- 2 teaspoons vanilla extract
- ⅓ cup (82g) sour cream, room temperature
- 2 ¾ cups (301g) powdered sugar, divided
- 2 tablespoons light corn syrup, divided
- 1 teaspoon vanilla extract, divided
- 2–5 tablespoons warm water, divided
- ¼ cup (20g) unsweetened cocoa powder
Instructions
- Preheat the oven to 350°F and line two cookie sheets with parchment paper or silicone mats.
- In a small bowl, whisk together flour, baking soda, and salt. Set aside.
- In a stand mixer or large bowl, cream the softened butter with granulated sugar until light and fluffy, about 3 minutes. Scrape down the sides and bottom of the bowl.
- Beat in eggs and vanilla until well combined.
- With the mixer on low speed, add half of the flour mixture and mix until just combined. Then add the sour cream and mix until incorporated.
- Add the rest of the flour mixture and mix until just combined; the dough will be soft and sticky.
- Using a large cookie scoop, drop 3 tablespoons of dough for each cookie on the prepared cookie sheets, spacing them 3 inches apart.
- Bake for 15-18 minutes, until the edges are light golden brown and the centers are set. Allow cookies to cool completely.
- Once cooled, turn the cookies over so the flat side is facing up.
- For the white frosting, whisk together 1 ¼ cups powdered sugar, 1 tablespoon corn syrup, ½ teaspoon vanilla, and 1-2 tablespoons warm water until it reaches spreading consistency. Frost half of each cookie with this frosting.
- For the black frosting, whisk 1 ½ cups powdered sugar and cocoa with 1 tablespoon corn syrup, ½ teaspoon vanilla, and 1-3 tablespoons warm water until it reaches spreading consistency. Frost the other half of each cookie with this mixture.
- Let the cookies sit for about 20 minutes to set their frostings.
- Store cookies in an airtight container between wax paper at room temperature for about 3 days or freeze for up to 3 months.
Notes
Ensure the butter is softened for easy creaming.
Let the cookies cool completely before frosting to prevent melting.
Store cookies in an airtight container to maintain freshness.
Nutrition
- Serving Size: 1 cookie
- Calories: 150
- Sugar: 10g
- Sodium: 100mg
- Fat: 6g
- Saturated Fat: 4g
- Unsaturated Fat: 2g
- Trans Fat: 0g
- Carbohydrates: 22g
- Fiber: 0g
- Protein: 2g
- Cholesterol: 25mg